Saturday, November 27, 2010

DIY- A Built In Over The Door Decorative Shelf Reveal


Here it is, our built in over the door decorative shelf. I just love how it turned out. We can now change the items we choose to display through out the season.

We hung some realistic looking dried pine cones and berries garland by sticking some of those clear temporary plastic hooks on the front of the molding to the shelf.

I think it looks great, and has a very natural look to it, I might just keep it up all year long as part of our country them. Hope you enjoyed this project and feel inspired to do one similar. In the future I plan to do two more over the two french doors in the back of the house, but I think I'll save those till spring time. Thanks for stopping by, more DIY projects to come soon. I'll be posting how to build your own fireplace mantel with pegs for hanging your stockings.

Nicole

Friday, November 26, 2010

DIY - A Built In Two Story Foyer Decorative Shelf

This is a project I completed last month when the weather was slightly warmer then it is now. I came up with the idea as a compromise with my self to update the foyer in our home.

At first I wanted to paint the it, but as you can see it's a two story job, and we don't have a ladder tall enough to reach or the budget to hire some one else to paint it. So I decided to add some color and interest by building a shelf to overhang the front door. This was a very cost effective compromise.


I went down to my local LOWES and bought a 1" X 11" X 6' board and had them cut it down to a length that would fit across my front door and leave a little space on each side and not touch the flanking walls. I also purchased a pair of decorative wooden shelf brackets with a key hole mount already in the back of them.

You will need some wood nails or wood screws, 3 small L-brackets, wood glue, and paint. I choose spray paint for this project, but you will need 2-3 cans to fully coat a shelf this large.

In a later project that I will be posting later, I decided to primer the wood first with a basic paint primer then spray paint over that. It took far less spray paint this way, I only used 1 can up. But a can of primer costs more than 3 cans of spray paint, so this is a good option if you happen to already have primer in the house.


I recommend spackling any deep imperfections in the wood and allowing it to dry first, so that you have the look of a nice even surface after it's painted.

Another tip is if you have an imperfection and no spackling or don't want to bother with it, just put that side of the board facing towards the ceiling that way you won't see it from down below.


Now you don't have to do this next part, but since this shelf was going above the front door, and my kids always slam that door when going through it, I added a thin strip of trim along the front edge of the shelf. This way if anything were to shift from the vibration of the slamming door, they would not fall off the edge.

To save your self some time, there really is no need to paint the back of the shelf that will be against the wall, but be sure to tape over the key hole hardware so you don't gunk it up with paint.

When assembling and painting your shelf, you can prop it up outside on a pair of trash cans, this makes a good work bench.

Use wood glue first to attach the brackets and trim to the shelf, then later after it has dried you can use nails or wood screws to secure everything. Make sure your brackets are placed far enough apart that they will clear the molding around your door and rest flatly on the drywall, but you want them to lay as close as possible to the molding, so that you are more likely to drill into a stud around the door frame to support the weight of your shelf.

After every thing is assembled enjoy the painting process. When hanging your shelf, add the L-brackets to the top. One in the center and one more at each end just above the wooden key hold bracket. This helps give extra support and stability to the shelf.

I was able to complete my shelf for about $40. I'll post the pic of the finished project mounted above the door at a later time. Oh the suspense!

Thanks for stopping by and check back soon.

Nicole

Monday, November 8, 2010

Flea Market Find - Put Together A Primitive Window Display For Under $20

I wanted to create the feel of a handmade holiday in our home this year. So besides the big projects, I'm also focusing on some little projects that are simple and inexpensive to make.

This project come together after one very successful trip our local flea market last week.

There I found some great deals, an old wooden window frame for $5 and an old style shelf with peg hooks for $2. I got them from two different vendors, so I couldn't believe how well they went together when I put them up on the wall.

The week before I went to flea market, I found 2 pewter candle holders at the salvation army for 50 cents each.

They go perfect with this display. After putting it all up, I wanted to jazz it up a bit so after another quick trip to the craft store I bought a small $3 wreath, a spool of red gingham ribbion, a rust colored star ornament for $1, and a set of 20 white x-mas lights for $1.99.

I wrapped the wreath with the lights, tied 6 red gingham bows and attached them with some wire I had at home. Then cut a long strip of ribbion to dangle the whole wreath from, and then in a matter of minutes, instant home made holiday project.

The other items I decided to add I picked up either at the craft store or Walmart. If I exclude the FAMILY sign that cost me $9 at Walmart, I would say this whole display only cost me under $20 to put together. Now that's a  homemade holiday project that won't break your budget if ever I saw one.

Thanks for stopping by,

Nicole

Sunday, November 7, 2010

Entryway Nook - Key Collage Wall

 I've been going around the house trying to add some color to the walls one by one. Most of the rooms still have the same off white base coat color they had when we moved in 3 years ago!

So I've been thinking up projects to work on and today I tackled the nook in the entryway, and the lower half of the dinning room at the same time.

The idea for the nook, came to me one day, when I realized I collect allot of keys. I just love skeleton keys, if I find a really nice looking key, I just have to have it.

I really don't know why I love them so much, but I think it might have something to do with the secret or mystery of what they unlock.

Keys open so many great things, doorways to old long forgotten rooms, hope chests, old iron gates, our diaries filled with our most treasured secrets, they unlock our imaginations, and we can give the key to our heart to some one we love.


 So I collected together all the keys I had laying around the house for a key collage. I managed to find a key hook to hold your keys, that was a hard find.

We painted the wall "Carmel Apple" and then hung the keys. We added a wall decal sticker of a little chandelier hanging from the doorbell box.

I hope this idea may inspire you to make a collage of your own, out of something you love. Look around and see if maybe you have an unbeknownst to you collection of something and then put it on display, share your passion with others and tell your story.

I still have more projects coming up, as you can see in the background on the kitchen wall, I've been swatch painting all over my house. So hopefully we'll keep getting things done around here, and then I can share them with all of you.

Thanks for stopping by! Nicole

Thursday, November 4, 2010

Winter Blues Etsy Treasury

Are you starting to feel the winter blues already? Summer is long gone, and fall is quickly nearing it's end, the colors are starting to fade from the trees, leaving behind a landscape of brown bare trees. Winter is on it's way, shake off those winter blues with this adorable little treasury put together by Etsy Store OrnimentalBotique. This treasury is sure to get you thinking about the good side of winter.

Tuesday, November 2, 2010

DIY Chandelier Cranberry Candle Wreaths

Hello everyone, I'm really excited to tell you about this project. They are cranberry candle wreaths, that look great when added to your lighting fixture. These are allot of fun to make and are very easy and inexpensive, which is the best part. A quick little project to help get your home ready for the holidays.

I'm making these for a 10 arm chandelier in my dinning room.


To make the cute little cranberry candle wreaths you will need some small grape vine wreaths, that you can find at most craft stores. I got mine at Michaels for 49 cents each x 10 of them so they cost me under $5.
The next thing you will need is a vine of what ever kind of holiday garland you choose, cranberries, holly, little green leaves, candy or gum drop themed, what ever you find that would fit your theme this year. I would like to use mine all year round as I am doing a country theme in my dinning room, so I went with red cranberry. This 5ft vine was on sale so it cost me under $5.

The first thing you need to do is cut little twigs off the main vine, I found that 3 little twigs is enough per wreath.
Then you weave the end of each twig into the wreath, if you picked a vine with a brown color stem it will blend right in with the wreath so you don't even need to hid end of the twig, it just looks like it's part of the wreath.
Begin bending the twig around the wreath in a sort of spiral. Then start positioning your berries or leaves, bending them in what ever random direction you want them to go. Try twisting some of the berry's wires together to help hold them in place. 
If you like you can also purchase some craft wire and wrap this around the whole wreath when you are done to secure the berries into place, but this isn't necessary. I didn't use any additional wire, I wanted the berries to be scattered about so that you could easily see them from a distance.

When you have made enough wreaths you can then transfer them to your chandelier. Most candle like chandeliers will have a little "wax trey" at their base, which is perfect for these cute little wreaths to sit in.


This is a great project that instantly transforms a boring light fixture. The red berries I chose really contrast against the newly painted yellow walls in our dinning room. I plan to leave them up all year round as part of my new primitive country theme I am starting in there.

I hope you enjoyed this little project of mine, all done for about $10. This project is so easy and can be a shared family craft. If you have children, give them each a wreath to decorate. Some times I have my son help me out with little projects like this in between our home school classes.


I have some more projects coming up along the lines of primitive home decor that I can't wait to share with all of you, so keep checking back for more.

Thank you for stopping by,

Nicole

Moonlight Masqurade A Fantasy Artists of Etsy Treasurey

"Well its a marvelous night for a moon dance with the stars up above in your eyes, A fantabulous night to make romance 'neath the cover of October skies" The lyrics to a fantastic song by Michael Buble, couldn't' have said it better myself. A stunning treasury created by the Fantasy Artists of Etsy Team Members, capturing the magic that is a Moonlight Masquerade. Enjoy!

Tuesday, October 26, 2010

Wine A Little You'll Fell Better

A Tuscan Treasury with subtitle hughes of color as we head into fall. Inspired by the vineyards of Italy our newest Etsy treasury features some talented creations of various Etsy artists. So sit back relax, sip the wine, and taste that which fall's bounty hath brought us.

Sunday, October 17, 2010

The Lady of Shalott

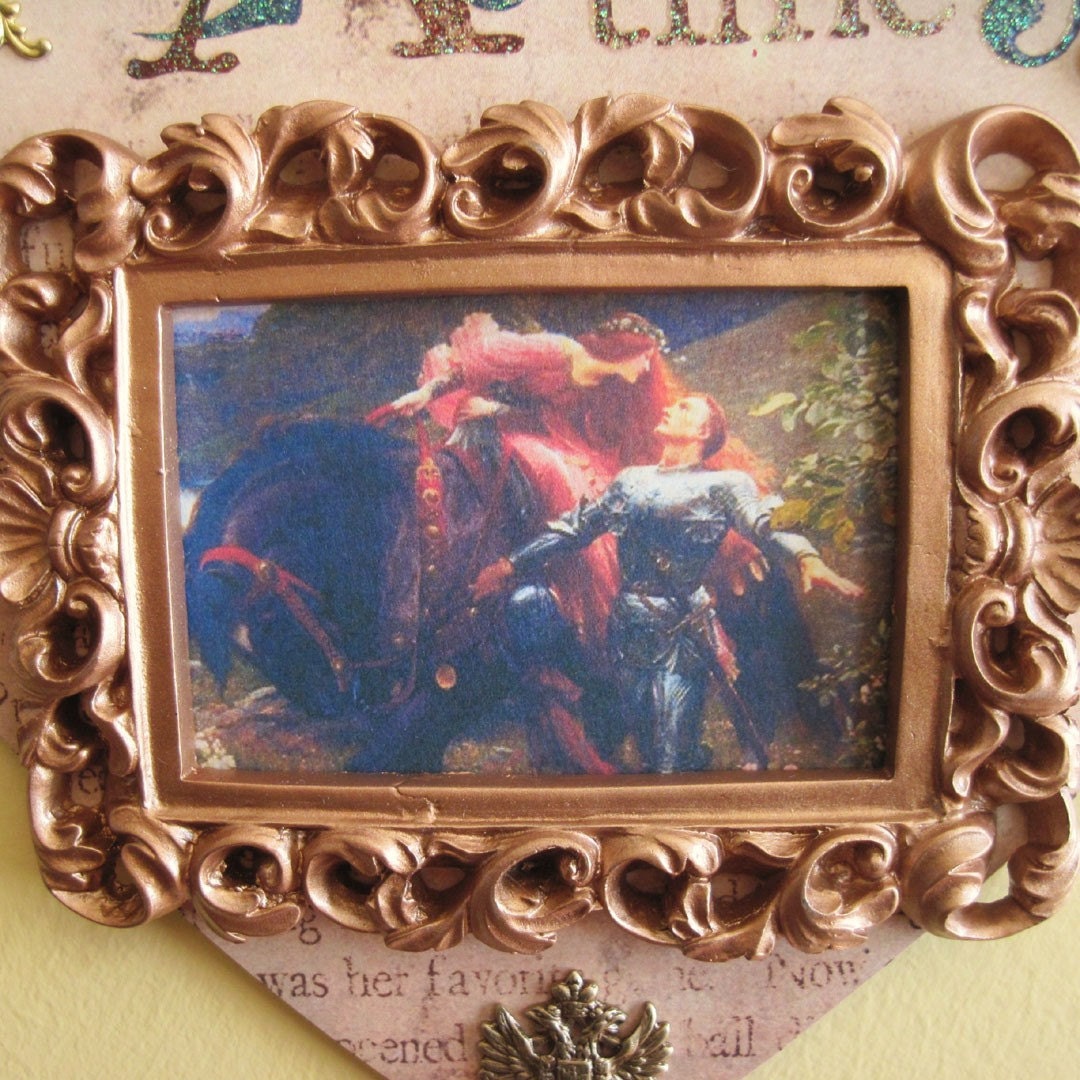
I use to love fairy tales at bedtime. Stories of Cinderella, Sleeping Beauty, and King Arthur always filled my head with the most wonderful dreams each night. I felt inspired by those tales to create the theme of this heart. I have made several hearts each with their own theme of love, but I feel this one truly touches my heart.

With that said I wanted to share with you a peom that I recently read that made me remember my love of fairy tales which lead to the trip down memory lane which lead to this creation. Many people may already know about this popular poem, but I only just discovered it.


(To see more of our crafts go hereOnce Upon A Time Fairy Tale Hanging Wall Plaque)

The Lady of Shalott a poem  by Alfred Lord Tennyson

On either side the river lie
Long fields of barley and of rye,
That clothe the wold and meet the sky;
And thro' the field the road runs by
To many-tower'd Camelot;
And up and down the people go,
Gazing where the lilies blow
Round an island there below,
The island of Shalott.

Willows whiten, aspens quiver,

Little breezes dusk and shiver
Through the wave that runs for ever
By the island in the river
Flowing down to Camelot.
Four grey walls, and four grey towers,
Overlook a space of flowers,
And the silent isle imbowers
The Lady of Shalott.


By the margin, willow veil'd,
Slide the heavy barges trail'd
By slow horses; and unhail'd
The shallop flitteth silken-sail'd
Skimming down to Camelot:
But who hath seen her wave her hand?
Or at the casement seen her stand?
Or is she known in all the land,
The Lady of Shalott?


Only reapers, reaping early,
In among the bearded barley
Hear a song that echoes cheerly
From the river winding clearly;
Down to tower'd Camelot;
And by the moon the reaper weary,
Piling sheaves in uplands airy,
Listening, whispers, " 'Tis the fairy
Lady of Shalott."

Tuesday, October 12, 2010

Our Fall Branch Bracelet Give Away Has Ended, But There Is More To Come.

Well all good things must come to an end, and so our 2nd giveaway is over.

Thank you all who entered the giveaway, we had allot more entries this time then during our last one. Hopefully that trend will continue in future giveaways.

Thank you all who have become followers of our humble blog we hope to hear wonderful things from you in the future.


I also want to send out a big thank you to Amanda at THE HAND ME DOWN HOUSE for hosting our 1st and 2nd giveaways! When you get the time, please go check out her blog as it is filled with DIY advice, more giveaways, link parties, interesting tidbits and good advice.

The winner of our fabulous autumn orange branch bracelet will be announced in the next few days, as Amanda at The Hand Me Down House is currently away, but will be back shortly to crunch the numbers with her handy dandy Random.org number cruncher thingy. Good luck to all who entered and we can't wait to see which one of you will take home this fabulous prize.

But Wait There's More...

There will be another giveaway this month starting on 10/26-11/1 for another Handmade Shamble Ramble item from our Etsy shop.  The item to be given away has yet to be determined, so stay tuned.

Thank you for stopping by,

Nicole

Saturday, October 9, 2010

New Look For The Dinning Room Reveal

Giving a face lift to the dinning room was a project that I had been dreaming about for months, this weekend we finally took it on.

I must have Fall fever or something because I've been paging through all those great magazines that come out in the fall, you know the ones, where every one's home looks like Martha Stewart's and their holiday decorations are just perfect, and their furniture is just perfect and their table settings are just perfect, and their.... you get the idea. Well I decided to take my first step towards getting my house look like "This is the house that love built"
and not like "Were just staying temporarily so don't get to comfy".
The color we selected is called Evening Glow. It's sort of like a butter cream yellow.


 I'm still debating whether I think it goes well with the rattan colored wall paper we had around the bottom of the room, my thought is maybe to pain that a cranberry red.

 We added 3 2' black shelves between the windows and decals. I updated our bulletin board. It had a typical natural wood frame around it, which I have now spray painted glossy black to match the shelves.


To do that I found the biggest piece of cardboard I had, and used painters tape to attach it to the center of the peg board, then used painters tape to cover up the rest of the area that did the cardboard did not cover up. Then I took it outside laid it on top of a trash can and sprayed the wooden frame with glossy black spray paint.

The decals, are wall stickers that I purchased for only $2 locally at a store called Christmas Tree Hill. I couldn't believe they were that inexpensive, so I bought a whole bunch of different sayings.


I plan to do more in here, one of my future projects I hope, will be to paint our nickle colored chandelier in this room, black to resemble one of those country ones.

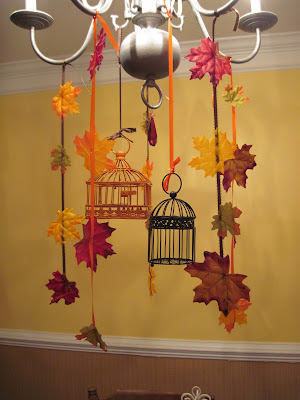
The last thing I did was to update the chandelier with a black and orange hanging bird cages which I purchased at Michael's craft store for $1 each.  For instructions on how to do this project see my Leaf and Ribbon Cascading Chandelier Project.


Thank you all,
Nicole

Wednesday, October 6, 2010

Woodland Masquerade and Pretty in Pink Treasuries

Check out two new treasures just posted this week by the Fantasy Artists of Etsy Team. Aren't they gorgeous!

The first treasury is brought to you by Valorie of The Fairie Bower who is hosting a fantasy masquerade ball and you are all invited – just drop in on her incredible treasury, “Woodland Masquerade”:


And our second treasury is brought to you by Susan of Spinning Castle, where you can "Move Through the Magical Realm" with Tribal Faerie inspired Art and Accessories, has joined the ranks of the Pink Warriors with her glorious homage to John Hughes’ film, “Pretty in Pink,” and NBCAM.  Here is her latest treasury, “Isn’t She Pretty in Pink?


REMINDER: OUR GIVEAWAY IS GOING ON NOW THROUGH 10/11

Don't miss out on your chance to own one of our fall themed branch bracelets that we will be GIVINGAWAY now through 10/11. This is the perfect way to show off your love for fall. See our Giveaway page for details on how to get up to 4 ENTRIES into this drawing and GOOD LUCK!

Decorating your front door and Stairs for Fall

This is a project I tackled last night, I wanted to bring a little of that autumn warmth inside.

Wrapping our stair banisters has become a family tradition every year around Christmas. We would wrap them in shinny Christmas garland, some times we use green and other years red and white to look like candy canes. Then we would wind either multi colored or white Christmas lights on top of them.

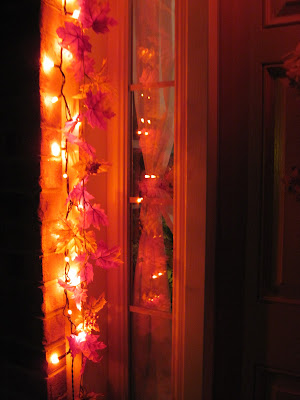
This is the our first time wrapping the stairs for fall. I used some of the bright leaf garland you can find at any craft store this time of year, then added the orange Halloween lights on top.

We turn them on each evening and it instantly changes the mood of the whole house. They also provide a warm welcome for friends and family to see as soon as they walk into your home.


Be sure not to neglect your front door this Holiday Season, send a warm and inviting message to all who pass by. After all isn't this the time of year when we want to spread that warmth and joy we feel to others.

We added the same leaf garland around our front door outside along with the orange lights. I love to just stand out side and look at it. If I didn't already live here I would want to be welcomed in. It just makes you feel warm looking at the lights on a cold night.


We bought two hay bails, mums, and pumpkins from a local farmers market. We also buy plenty of long neck pumpkins while were there for our home made pumpkin pies.We leave them out side in the cold to keep them fresh, every weekend we'll just step outside and grab one to bake a fresh pie.

Thanks,

Nicole


Tuesday, October 5, 2010

FALL BRANCH BRACELET GIVEAWAY!

New Giveaway Starts 10/6/10-10/11/10


Starting tomorrow Shamble Ramble will be giving away an eye catching fall themed branch bracelet. This giveaway will once again be hosted by our friend Amanda at The Hand Me Down House, you will need to visit her site to enter the drawing. See our Giveaway page for details.

Creating a Simple Leaf and Ribbion Cascade for Fall

Today I'm going to show you how to make a really easy Fall leaf and ribbion cascade that you can attach to any hanging light in your house. This project is very budget friendly and  takes only a few short minutes to do and can really add allot of warmth and visual interest over your dinning room table.


The supplies you will need can be found at a local craft store. You will need 1 or more small spools of ribbion. You can choose any color of ribbion you like, but this looks best if you choose more than one. I have chosen to use a chocolate brown and pumpkin orange. You will also need a packet of loose faux fall leaves and a stapler.


Cut the ribbion into strips of 24" long. For a layered look you may cut ribbons into 2 or more different lengths.


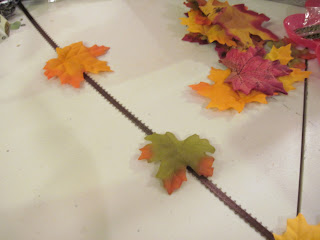
Next lay out your leaves over the ribbion and arrange them so that the leaves are at an angle so they look like they are falling.


Next put one staple in each leaf, and staple it to the ribbion.


Then tie each ribbion onto an arm of you light fixture. I put one on each arm, but you can add as many ribbons as you like and even vary the lengths for a more layered look, you can even ad beads in between each leaf on the ribbion if you like. I added two mini bird cages as a focal point. This is the perfect project to get creative with and really put your own spin on it.

Nicole