I must have Fall fever or something because I've been paging through all those great magazines that come out in the fall, you know the ones, where every one's home looks like Martha Stewart's and their holiday decorations are just perfect, and their furniture is just perfect and their table settings are just perfect, and their.... you get the idea. Well I decided to take my first step towards getting my house look like "This is the house that love built"
and not like "Were just staying temporarily so don't get to comfy".The color we selected is called Evening Glow. It's sort of like a butter cream yellow.
I'm still debating whether I think it goes well with the rattan colored wall paper we had around the bottom of the room, my thought is maybe to pain that a cranberry red.
We added 3 2' black shelves between the windows and decals. I updated our bulletin board. It had a typical natural wood frame around it, which I have now spray painted glossy black to match the shelves.
 To do that I found the biggest piece of cardboard I had, and used painters tape to attach it to the center of the peg board, then used painters tape to cover up the rest of the area that did the cardboard did not cover up. Then I took it outside laid it on top of a trash can and sprayed the wooden frame with glossy black spray paint.
 The decals, are wall stickers that I purchased for only $2 locally at a store called Christmas Tree Hill. I couldn't believe they were that inexpensive, so I bought a whole bunch of different sayings.
I plan to do more in here, one of my future projects I hope, will be to paint our nickle colored chandelier in this room, black to resemble one of those country ones.
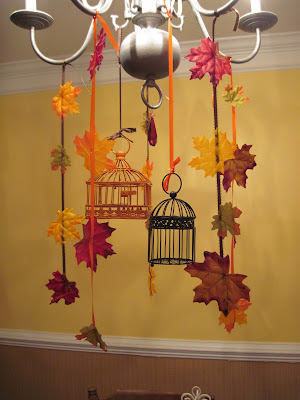
The last thing I did was to update the chandelier with a black and orange hanging bird cages which I purchased at Michael's craft store for $1 each. For instructions on how to do this project see my Leaf and Ribbon Cascading Chandelier Project.
Thank you all,
Nicole


No comments:
Post a Comment